How to Make Perfect Mummy Cookies Fast
If you’re looking for a fun and festive treat this Halloween, you can’t go wrong with Mummy Cookies. These delightful little snacks combine simple ingredients with spooky creativity to make an irresistible baked good that’s perfect for parties, trick-or-treaters, or just a delightful seasonal snack. Learn how to make delicious Mummy Cookies quickly with simple steps and spooky fun everyone will love, whether you’re a beginner baker or a seasoned pro.
Why You’ll Love This Recipe
- Quick and Easy Preparation: You can whip up a batch of Mummy Cookies in under 30 minutes, making it perfect for last-minute Halloween fun.
- Kid-Friendly and Fun: Decorating the cookies like mummies adds a creative twist that kids (and adults) enjoy helping with.
- Versatile Ingredients: Uses kitchen staples you likely have on hand, making it super convenient.
- Perfect Halloween Treat: These cookies not only taste great but add a festive vibe to any party or gathering.
- Customizable Designs: You can easily customize the look, adding your own spin on the classic mummy with different toppings and expressions.
Ingredients You’ll Need
The magic of these Mummy Cookies lies in their simplicity. Each ingredient plays a key role—whether in creating that soft cookie base or the sweet, decorative ‘bandages’. Here’s what you’ll need:
- All-Purpose Flour: The foundation of the cookie dough, providing structure and a soft crumb.
- Sugar: Adds sweetness and helps the cookies brown beautifully as they bake.
- Butter: Gives the dough richness and a melt-in-your-mouth texture.
- Egg: Binds all the ingredients together for a smooth dough consistency.
- Baking Powder: Helps the cookies rise slightly for a tender bite.
- Vanilla Extract: Adds delicate flavor depth to enhance the sweetness.
- White Chocolate or Royal Icing: For drawing the mummy bandages over the cookies.
- Mini Chocolate Chips or Candy Eyes: Essential for making the mummies’ spooky eyes pop.
Variations for Mummy Cookies
This recipe is wonderfully adaptable. Whether you have dietary restrictions, ingredient preferences, or just want to try something new, these variations make it easy to customize your perfect batch of Mummy Cookies.
- Gluten-Free Version: Substitute all-purpose flour with a gluten-free blend to keep these creepy treats safe for everyone.
- Dark Chocolate Bandages: Swap white chocolate for dark chocolate to give the mummies a dramatic, bold look.
- Spiced Cookies: Add cinnamon or pumpkin pie spice to the dough for an extra fall-flavored twist.
- Vegan Adaptation: Use coconut oil instead of butter and flax eggs to keep these cookies animal-product-free.
- Colorful Eyes: Use colored candies or edible markers to give each mummy a unique, playful personality.

How to Make Mummy Cookies
Step 1: Prepare the Cookie Dough
Start by creaming the softened butter and sugar together until light and fluffy. Beat in the egg and vanilla extract, then slowly incorporate the flour and baking powder until a smooth dough forms. Be careful not to overmix to keep the cookies tender.
Step 2: Shape the Cookies
Take small portions of dough and roll them into oval shapes resembling mini mummies. Place the shaped dough onto a parchment-lined baking sheet, spaced about an inch apart to allow for slight spreading.
Step 3: Bake
Bake the shaped cookies in a preheated oven at 350°F (175°C) for approximately 10-12 minutes, or until they’re just starting to turn golden on the edges. Remove from the oven and let them cool completely on a wire rack before decorating.
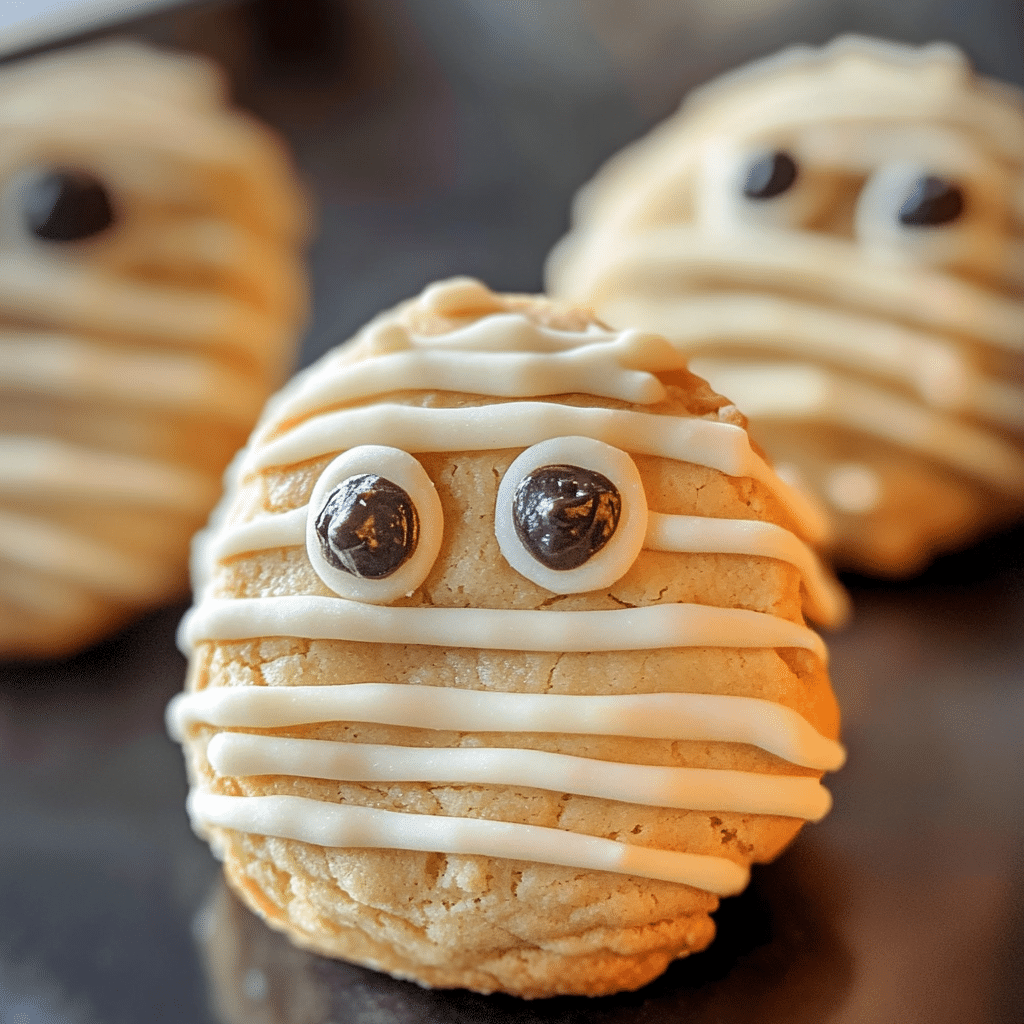
Step 4: Decorate with ‘Bandages’ and Eyes
Use melted white chocolate or royal icing to pipe thin, horizontal lines across each cookie, mimicking the look of mummy bandages. While the icing or chocolate is still wet, add mini chocolate chips or candy eyes to create a spooky, fun gaze. Allow the decoration to set completely before serving.
Pro Tips for Making Mummy Cookies
- Use Room Temperature Ingredients: Makes it easier to mix dough evenly and prevents lumps.
- Chill the Dough: For firmer dough that’s easier to shape, chill it for 20 minutes before rolling.
- Pipe Slowly: When adding bandages, pipe the lines in thin layers for the most realistic mummy effect.
- Don’t Skip Cooling: Make sure cookies are fully cool before decorating to avoid melting the icing or chocolate.
- Experiment with Eyes: Try different sizes and colors to add personality and variety to your mummy collection.
How to Serve Mummy Cookies
Garnishes
Add a sprinkle of edible glitter or a dusting of cinnamon for an extra festive look. You can also place the cookies on a bed of shredded coconut tinted green or orange to resemble spooky grass or autumn leaves.
Side Dishes
Mummy Cookies pair beautifully with warm drinks like hot chocolate or spiced apple cider. Serve alongside a pumpkin-shaped cheese platter or caramel popcorn for a well-rounded Halloween snack spread.
Creative Ways to Present
Display your Mummy Cookies on black or orange platters for a bold seasonal contrast. Arrange them in coffin-shaped boxes or on decorative spider web doilies to set the spooky mood at your party.
Make Ahead and Storage
Storing Leftovers
Keep leftover Mummy Cookies in an airtight container at room temperature to maintain their crisp edges and chewy centers for up to 5 days.
Freezing
Wrap decorated cookies individually in plastic wrap and place them in an airtight freezer bag to freeze for up to 3 months. Thaw at room temperature when ready to enjoy.
Reheating
For a just-baked warmth, place cookies in a preheated oven at 300°F (150°C) for 3-5 minutes, but avoid microwaving as it can soften the decorations.
FAQs
Can I use store-bought cookie dough for Mummy Cookies?
Absolutely! Store-bought dough can save time; just shape the cookies and decorate using the mummy bandage and eye techniques described.
What if I don’t have white chocolate or royal icing for decoration?
You can substitute with store-bought vanilla frosting or melted vanilla candy melts for a similar effect on the bandages.
Are Mummy Cookies suitable for kids with nut allergies?
This basic recipe is nut-free, but always check ingredient labels on any store-bought items you use to be sure.
How can I make the eyes if I don’t have candy eyes?
Use small dots of melted chocolate or black icing to create eyes, or press mini chocolate chips gently into the icing bandages while still soft.
What’s the best way to transport Mummy Cookies to a party?
Pack them in a sturdy, airtight container with parchment paper layers to prevent decorations from smudging during transit.
Final Thoughts
Mummy Cookies are more than just a Halloween treat — they’re a playful way to bring seasonal fun into your kitchen with minimal effort and maximum delight. Whether you’re baking with family, hosting a spooky party, or just craving a themed sweet snack, these quick and easy cookies will become a beloved favorite. Grab your ingredients and give this festive recipe a try; you’ll love the smiles these little mummies bring to your table!