How to Make Delicious Mummy Bark This Halloween
If you’re looking for a Halloween treat that’s both fun and absolutely delicious, this Mummy Bark recipe is just what you need. With its spooky design and delightful combination of flavors, Mummy Bark offers a festive twist on classic candy bark that’s perfect for sharing with kids and adults alike. Easy to make, visually impressive, and irresistibly tasty, this recipe will quickly become a fall favorite for your Halloween celebrations.
Why You’ll Love This Recipe
- Easy and Quick: You can whip up this Mummy Bark in under 30 minutes, making it ideal for last-minute Halloween treats.
- Fun and Festive: The mummy design is playful and perfect for Halloween parties or classroom snacks.
- Customizable Flavors: You get to choose from a variety of chocolates, candies, and toppings to make it uniquely yours.
- Kid-Friendly: It’s simple enough for children to help with and a hit with their Halloween-loving taste buds.
- Great for Gifting: Package pieces of Mummy Bark in cute bags or boxes for a homemade gift that looks impressive.
Ingredients You’ll Need
The beauty of Mummy Bark is in its simplicity and the way each ingredient contributes to the final product’s taste and texture. You don’t need a long list to create something impressive. Each item enhances the flavor, adds festive visuals, or ensures a delightful crunch.
- White Chocolate Chips or Melts: Perfect for the mummy “bandages” to give a smooth, creamy sweetness.
- Dark or Milk Chocolate: Provides a rich base that contrasts nicely with the white chocolate’s color and flavor.
- Mini Candy Eyes: These add a spooky and cute touch that brings the mummy theme to life.
- Crushed Pretzels or Nuts: Adds a salty crunch that balances the sweetness beautifully.
- Optional Halloween Sprinkles: For extra color and festivity, these elevate the bark’s visual appeal.
Variations for Mummy Bark
One of the best things about Mummy Bark is how easily you can tweak it based on what you have on hand or dietary preferences. Don’t be afraid to experiment with flavors or textures to make it truly your own.
- Nut-Free Version: Swap out nuts for rice cereal or crushed cookies to keep it safe for allergy sufferers.
- White Chocolate Base: Use white chocolate as the base and drizzle dark chocolate for contrast instead.
- Themed Colors: Add orange or purple candy melts for a more vibrant and unique Halloween color palette.
- Spiced Flavor: Mix in a pinch of cinnamon or pumpkin spice into the chocolate for a seasonal twist.
- Vegan Adaptation: Use dairy-free chocolate and skip any toppings containing animal products.

How to Make Mummy Bark
Step 1: Prepare Your Work Surface
Line a baking sheet with parchment paper or a silicone baking mat to ensure the bark doesn’t stick and is easy to remove once hardened. Get your toppings ready and keep the candy eyes within reach, as once the chocolate sets, you want to work quickly.
Step 2: Melt the Base Chocolate
Use a microwave-safe bowl or double boiler to gently melt your chosen dark or milk chocolate. Stir frequently to avoid burning and ensure a smooth texture. Once melted, spread the chocolate evenly over the lined baking sheet to about a quarter-inch thickness.
Step 3: Add the Crunch and Toppings
Sprinkle crushed pretzels, nuts, or any crunchy elements over the melted chocolate while it’s still warm. This creates that satisfying texture play you crave in bark recipes. Add Halloween-themed sprinkles if using for extra color and fun.
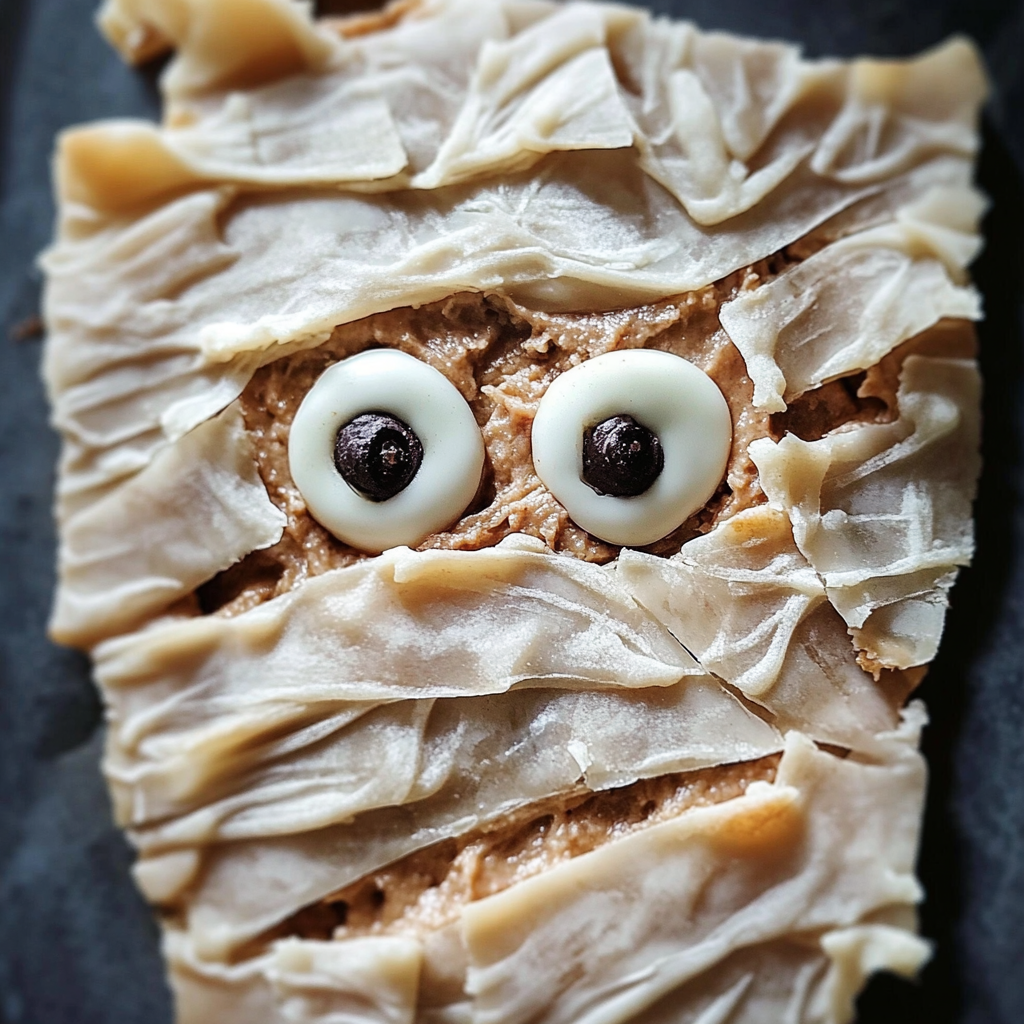
Step 4: Create the Mummy Bandages
Melt the white chocolate chips or melts slowly and transfer them to a piping bag or a zip-top bag with a tiny corner cut off. Drizzle the melted white chocolate back and forth across the dark chocolate base horizontally, mimicking the mummy’s wrapping.
Step 5: Add Candy Eyes
Before the white chocolate sets completely, carefully place mini candy eyes in pairs across the bark, embedding them slightly so they stick as the chocolate cools.
Step 6: Let It Set
Place the baking sheet in the refrigerator for 20-30 minutes until the chocolate is firm. Once hardened, break the bark into irregular pieces that showcase the mummy faces and wrapping effect.
Pro Tips for Making Mummy Bark
- Use Quality Chocolate: Better chocolate means smoother melting and richer flavor.
- Don’t Overheat Chocolate: Heat gently to avoid grainy texture or burning.
- Work Quickly: Add eyes and drizzle while chocolate is still soft for best adhesion.
- Use Parchment or Silicone: These make clean-up easier and prevent sticking.
- Customize Toppings: Try different candies or nuts for variety and personal taste.
How to Serve Mummy Bark
Garnishes
Serve Mummy Bark with extra candy eyes and sprinkles on the side so guests can add some sparkle themselves. Fresh mint leaves or a dusting of edible glitter can also enhance the spooky effect.
Side Dishes
Mummy Bark pairs wonderfully with warm apple cider, pumpkin spice latte, or a rich hot chocolate for a full Halloween treat spread. Fresh fruit or light cheese platters complement the sweetness nicely for balance.
Creative Ways to Present
Break the bark into small pieces and arrange on a decorative Halloween-themed platter or place in individual treat bags tied with festive ribbons. Using mini mason jars layered with Mummy Bark and popcorn also makes for a unique party favor.
Make Ahead and Storage
Storing Leftovers
Store Mummy Bark in an airtight container at room temperature for up to a week. Keep it out of direct sunlight and heat to prevent melting or blooming of the chocolate.
Freezing
You can freeze Mummy Bark wrapped tightly in foil and stored in a sealed bag for up to three months. Thaw in the refrigerator before serving to avoid condensation on the chocolate surface.
Reheating
Reheating isn’t necessary since Mummy Bark is best enjoyed chilled or at room temperature, but if the chocolate softens too much, simply refrigerate again until firm.
FAQs
Can I use other types of chocolate for Mummy Bark?
Absolutely! Dark, milk, white chocolate, or even compound chocolate can be used depending on your preference and availability.
Is Mummy Bark difficult to make for beginners?
Not at all! This recipe is beginner-friendly with straightforward steps and minimal ingredients, perfect for first-timers.
What if I don’t have candy eyes?
You can replace candy eyes with small chocolate chips, raisins, or even draw eyes with edible markers after the bark hardens.
Can I make Mummy Bark gluten-free?
Yes, simply omit pretzels or use gluten-free pretzels to keep the recipe gluten-free and still delicious.
How long does Mummy Bark last?
When stored properly, it lasts about a week at room temperature or longer if refrigerated or frozen.
Final Thoughts
Mummy Bark is a fantastic way to add some festive fun and flavor to your Halloween celebrations. It’s simple to create, endlessly customizable, and sure to delight everyone who tries it. Go ahead and turn your kitchen into a spooky sweet workshop this year—your taste buds will thank you!